Nestled within the complex labyrinth of a vehicle’s dashboard, a little sentinel keeps a vigilant eye on your engine’s health – the temperature gauge.
Its significance often goes unnoticed, silently working in the background, until one day, it falters, and you find yourself seemingly lost in a sea of concerns about your Chevy Silverado Truck well-being.
Through the intricate dance of metal and machine, what might appear as a mere hiccup on your dashboard may echo the initial whispers of deeper, underlying problems.
Possible causes for a non-working Chevrolet Silverado temperature gauge include a faulty temperature sensor, a malfunctioning gauge, wiring issues, or a bad thermostat. Solutions range from a sensor or gauge replacement and electrical system repair to a thermostat change. Always consult a mechanic.
- Understanding Your Silverado's Temperature Gauge
- Possible Causes of a Malfunctioning Temperature Gauge
- Troubleshooting Steps for a Non-working Temperature Gauge
- When to Consult a Professional Mechanic
- DIY Fixes: Replacing a Temperature Sensor and Thermostat
- Navigating Future Temperature Gauge Concerns
- Final Thoughts
- Sources
This article delves into the vast possibilities that might lead to a malfunctioning temperature gauge.
We seek comprehensive solutions that empower you to regain control of your Silverado journey to optimal performance.
Related:
- Troubleshooting the Blinking Red Light on the Dash of a Chevy Silverado (Solved)
- Should My Temperature Gauge Be In The Middle? (Must Read)
- Silverado C1500 vs. K1500: Which Pickup Truck Should You Choose?
Understanding Your Silverado’s Temperature Gauge
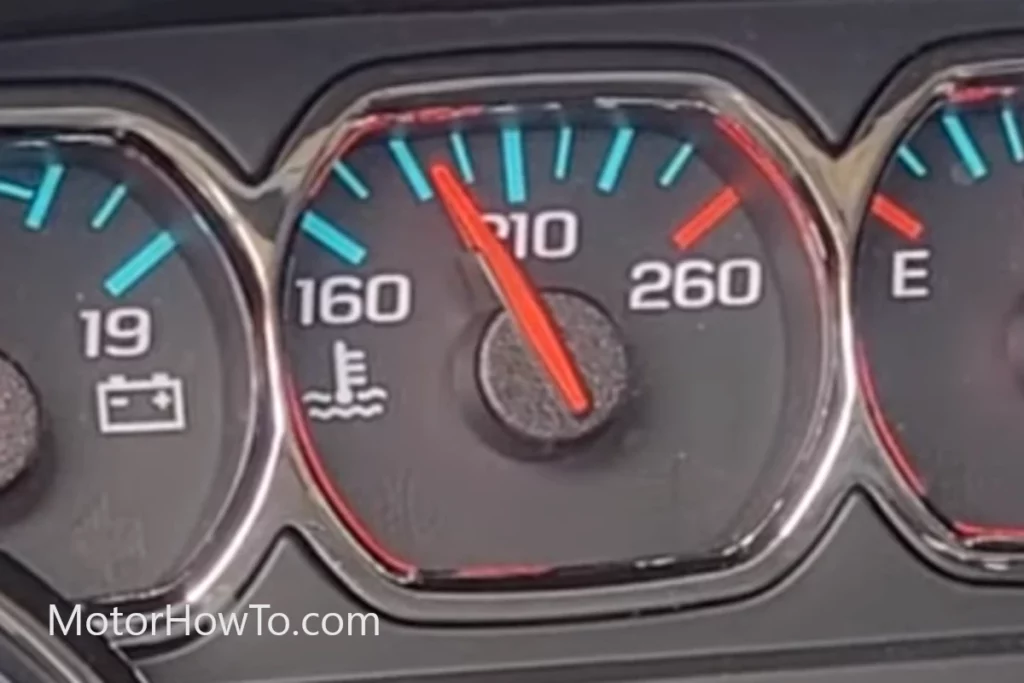
The temperature gauge in your Chevy Silverado is essential in monitoring the engine’s operating temperature. It serves as an early warning system, alerting you if your engine is running hotter or colder than it should be.
Normally, the needle in the gauge stays within the ‘normal’ range – that is, it neither veers too far into the hot nor cold zones.
However, if the needle strays into these extreme regions, it suggests that the engine is overheating or not reaching its optimal temperature, respectively. This can lead to inefficient performance and, in worst-case scenarios, engine damage.
The gauge’s operation is based on the engine coolant temperature sensor, which measures the temperature of the engine coolant. The sensor is a thermistor, a type of resistor whose resistance changes with temperature.
When the coolant temperature increases, the sensor’s resistance decreases, and this change is sent to the vehicle’s computer.
The computer then communicates this information to the temperature gauge, moving the needle accordingly. Understanding the basic working of the temperature gauge can help you appreciate its importance and troubleshoot when things go wrong.
Possible Causes of a Malfunctioning Temperature Gauge
Faulty Temperature Sensor
The temperature sensor, or coolant temperature sensor, is integral to properly functioning the temperature gauge. If it becomes faulty or fails, it may send incorrect signals or none to the gauge, leading to erratic readings or the gauge not working. Common signs of a faulty sensor include a constant low-temperature reading or a sudden spike to a high temperature, regardless of engine running time.
Malfunctioning Gauge
The temperature gauge itself may be malfunctioning. Gauges are not immune to failure and can develop faults over time, resulting in inaccurate readings or complete failure. Checking the gauge for faults may involve comparing its readings with an external temperature reading or using a scan tool to assess the accuracy of the data it displays.
Wiring Issues
Wiring issues can also affect the temperature gauge. The wiring that connects the temperature sensor to the vehicle’s computer and gauge can degrade or become damaged over time. Corroded, frayed, or loose wiring can lead to intermittent or false readings on the temperature gauge.
Problematic Thermostat
The thermostat in your vehicle helps regulate the flow of coolant through the engine. If stuck in the open or closed position, it can cause the engine to overheat or run too cool, affecting the temperature gauge reading.
An unresponsive temperature gauge, especially with other signs of thermostat issues such as poor engine performance or overheating, could indicate a problem.
Troubleshooting Steps for a Non-working Temperature Gauge
Step 1: Observation
First, take note of how the gauge is behaving. Is it stuck in one place, showing abnormally high or low, or no readings? This can help narrow down potential causes.
Step 2: Check the Coolant Level
Ensure the coolant level is within the recommended range. An insufficient coolant level can lead to overheating, causing erratic readings.
Step 3: Inspect the Wiring
Inspect the wiring leading to the temperature sensor. Look for visible damage like fraying, corrosion, or loose connections. A professional can help if you’re unsure.
Step 4: Test the Temperature Sensor
You might need a digital multimeter and a temperature-to-resistance chart specific to your vehicle model to check the temperature sensor. Consult your vehicle’s service manual for exact procedures.
Step 5: Test the Gauge
Compare the gauge reading with an independent temperature reading. If the two readings significantly differ, the gauge might be the issue.
Step 6: Check the Thermostat
Overheating or underheating the engine may indicate a stuck thermostat. To check, run the vehicle and observe whether the upper radiator hose gets hot. If it doesn’t, the thermostat could be stuck closed.
Step 7: Professional Diagnosis
If you’ve gone through these steps and haven’t pinpointed the issue, it’s time to consult a professional. Their expertise and specialized tools can help diagnose and fix the problem.
When to Consult a Professional Mechanic
It’s wise to consult a professional mechanic under several circumstances. For starters, if you’ve carried out basic troubleshooting steps but can still not identify the root cause of the malfunctioning temperature gauge, a professional can leverage their experience and specialized diagnostic tools to locate the problem more accurately.
Additionally, leaving the work to professionals is better if you need more confidence or experience in handling automotive repairs. Missteps in DIY repairs could inadvertently worsen the issue or cause additional problems, leading to more costly repairs in the future.
Moreover, certain solutions, like replacing the thermostat or fixing wiring issues, can be complex and may require specialized knowledge and tools. Even if you’ve identified these as the source of your problem, having a professional mechanic handle the repair is best.
Finally, any time the malfunctioning temperature gauge is accompanied by signs of severe engine problems — such as overheating, poor performance, or unusual noises — you should promptly take your Silverado to a mechanic.
These symptoms can signify serious issues that demand immediate professional attention to prevent long-term damage to your vehicle.
DIY Fixes: Replacing a Temperature Sensor and Thermostat
Replacing a Temperature Sensor
- Locate the Sensor: Find the temperature sensor in your Silverado – it’s usually located near the thermostat housing. Check your vehicle’s manual if you’re unsure.
- Disconnect the Battery: For safety, disconnect the negative terminal of your battery to avoid any accidental electrical discharge.
- Remove the Sensor: Disconnect the wiring harness from the sensor. Use a sensor socket or a wrench to unscrew the sensor.
- Install the New Sensor: Screw the new sensor instead of the old one. Tighten it as recommended in your vehicle manual to prevent damage.
- Reconnect: Reconnect the wiring harness and the battery terminal.
- Check: Start the engine and check the temperature gauge to ensure everything works properly.
Replacing a Thermostat
- Locate the Thermostat: The thermostat is usually located where the upper radiator hose connects to the engine.
- Drain Coolant: To avoid a mess, drain the coolant from the radiator until the coolant level is below the thermostat.
- Remove the Thermostat: Remove the bolts holding the thermostat housing, then remove the thermostat.
- Clean the Surface: Clean the mating surfaces of the thermostat housing and the engine to remove any residual gasket material or corrosion.
- Install the New Thermostat: Put in the new thermostat. Make sure it is positioned correctly as per your vehicle manual.
- Reassemble: Reinstall the thermostat housing. Tighten the bolts per the specified torque settings to avoid damaging the housing.
- Refill Coolant: Refill the radiator with coolant. Start the engine, check for leaks, and ensure the temperature gauge functions correctly.
Refer to your vehicle’s service manual for the exact procedures and specifications. If you are uncomfortable performing these tasks, taking your vehicle to a professional is best. Remember, safety comes first when performing DIY vehicle repairs.
Navigating Future Temperature Gauge Concerns
Being mindful of your Silverado’s temperature gauge is a key aspect of responsible vehicle ownership. A functioning gauge contributes significantly to preserving the engine’s health and preventing costly repairs.
Even though you’ve resolved a current issue with the gauge, you should continue to monitor it for any irregularities that could signal fresh concerns.
Stay proactive in maintaining your vehicle, and remember the importance of regular service and inspections. This helps catch any developing issues early, ensuring minor problems do not escalate into major repairs.
Be particularly attentive to your coolant levels and the condition of your thermostat, as these directly impact the readings on your temperature gauge.
In case of recurring or persistent issues with the temperature gauge, don’t hesitate to seek professional help. While some fixes are manageable with a DIY approach, others necessitate a mechanic’s expertise. Don’t overlook the importance of prompt, professional intervention in such cases.
Finally, continue learning about your vehicle. Understanding the ins and outs of your Silverado, particularly the signs that something might be amiss, will make you a more informed owner and enable you to address potential problems swiftly and effectively.
Being prepared to navigate future temperature gauge concerns is just one step in the journey toward the long and healthy life of your Chevy Silverado.
Final Thoughts
In the intricate landscape of your vehicle’s dashboard, one unsung hero stands guard over your engine’s well-being: the temperature gauge.
Often overlooked until it starts behaving erratically, this little sentinel plays a crucial role in keeping your Chevy Silverado running smoothly.
When it malfunctions, it can signal deeper issues that need your attention.
This article has explored the potential causes of a non-working Silverado temperature gauge, including a faulty temperature sensor, gauge problems, wiring issues, and a problematic thermostat.
It has also provided guidance on troubleshooting and offered insights into when to consult a professional mechanic. For those who feel comfortable, it has even covered DIY fixes for replacing a temperature sensor and thermostat.
Understanding your temperature gauge’s role in monitoring your engine’s health is vital. It serves as an early warning system, helping you avoid overheating or running too cool, both of which can lead to inefficient performance and potential engine damage.
Regularly monitoring your temperature gauge, coolant levels, and the condition of your thermostat is crucial for responsible vehicle ownership.
Catching developing issues early can prevent minor problems from escalating into major, costly repairs.
Remember that while some issues can be resolved with DIY efforts, others require professional expertise.
By staying informed about your vehicle and addressing potential problems promptly, you’ll ensure your Chevy Silverado continues to serve you reliably and efficiently.
So, keep an eye on that little sentinel on your dashboard, for it’s your trusted companion on the road to a long and healthy life for your Silverado.
Sources
Chevrolet Coolant Temperature Sensor Problems (Causes & Fixes)